

Can you simply paint over that yellowing water stain on your ceiling, or are you looking at a much deeper structural problem? It is a question every homeowner asks when they first spot moisture damage. You likely feel a nagging anxiety about hidden mold growth or underlying plumbing issues that could turn a small patch into a major headache. Addressing water damage drywall repair promptly is critical, as mold can begin to colonize in as little as 24 to 48 hours, potentially compromising your home’s air quality and safety.
We understand that you want a wall that looks brand new without the stress of a mismatched texture or recurring leaks. This guide will show you how to assess the damage professionally and ensure the moisture source is gone for good. We will walk through the specific steps to restore your home’s structure while keeping your living space healthy and mold-free. You will learn the exact techniques needed to achieve a seamless finish that blends perfectly with your existing walls, giving you the assurance that your property is in safe, capable hands.
Key Takeaways
- Identify visual cues of structural compromise, such as bubbling paint and “alligatoring” textures, to catch damage early.
- Learn why the high humidity in Texas makes wall cavities a primary breeding ground for mold growth.
- Evaluate the safety of your project by identifying hidden hazards like electrical wiring before beginning any water damage drywall repair.
- Discover how the “Square-Cut” method provides a solid foundation for new drywall and a perfectly matched texture.
- Gain peace of mind by understanding the professional standards required to restore your home’s air quality and structural safety.
Understanding Water Damage Drywall Repair: Signs and Severity
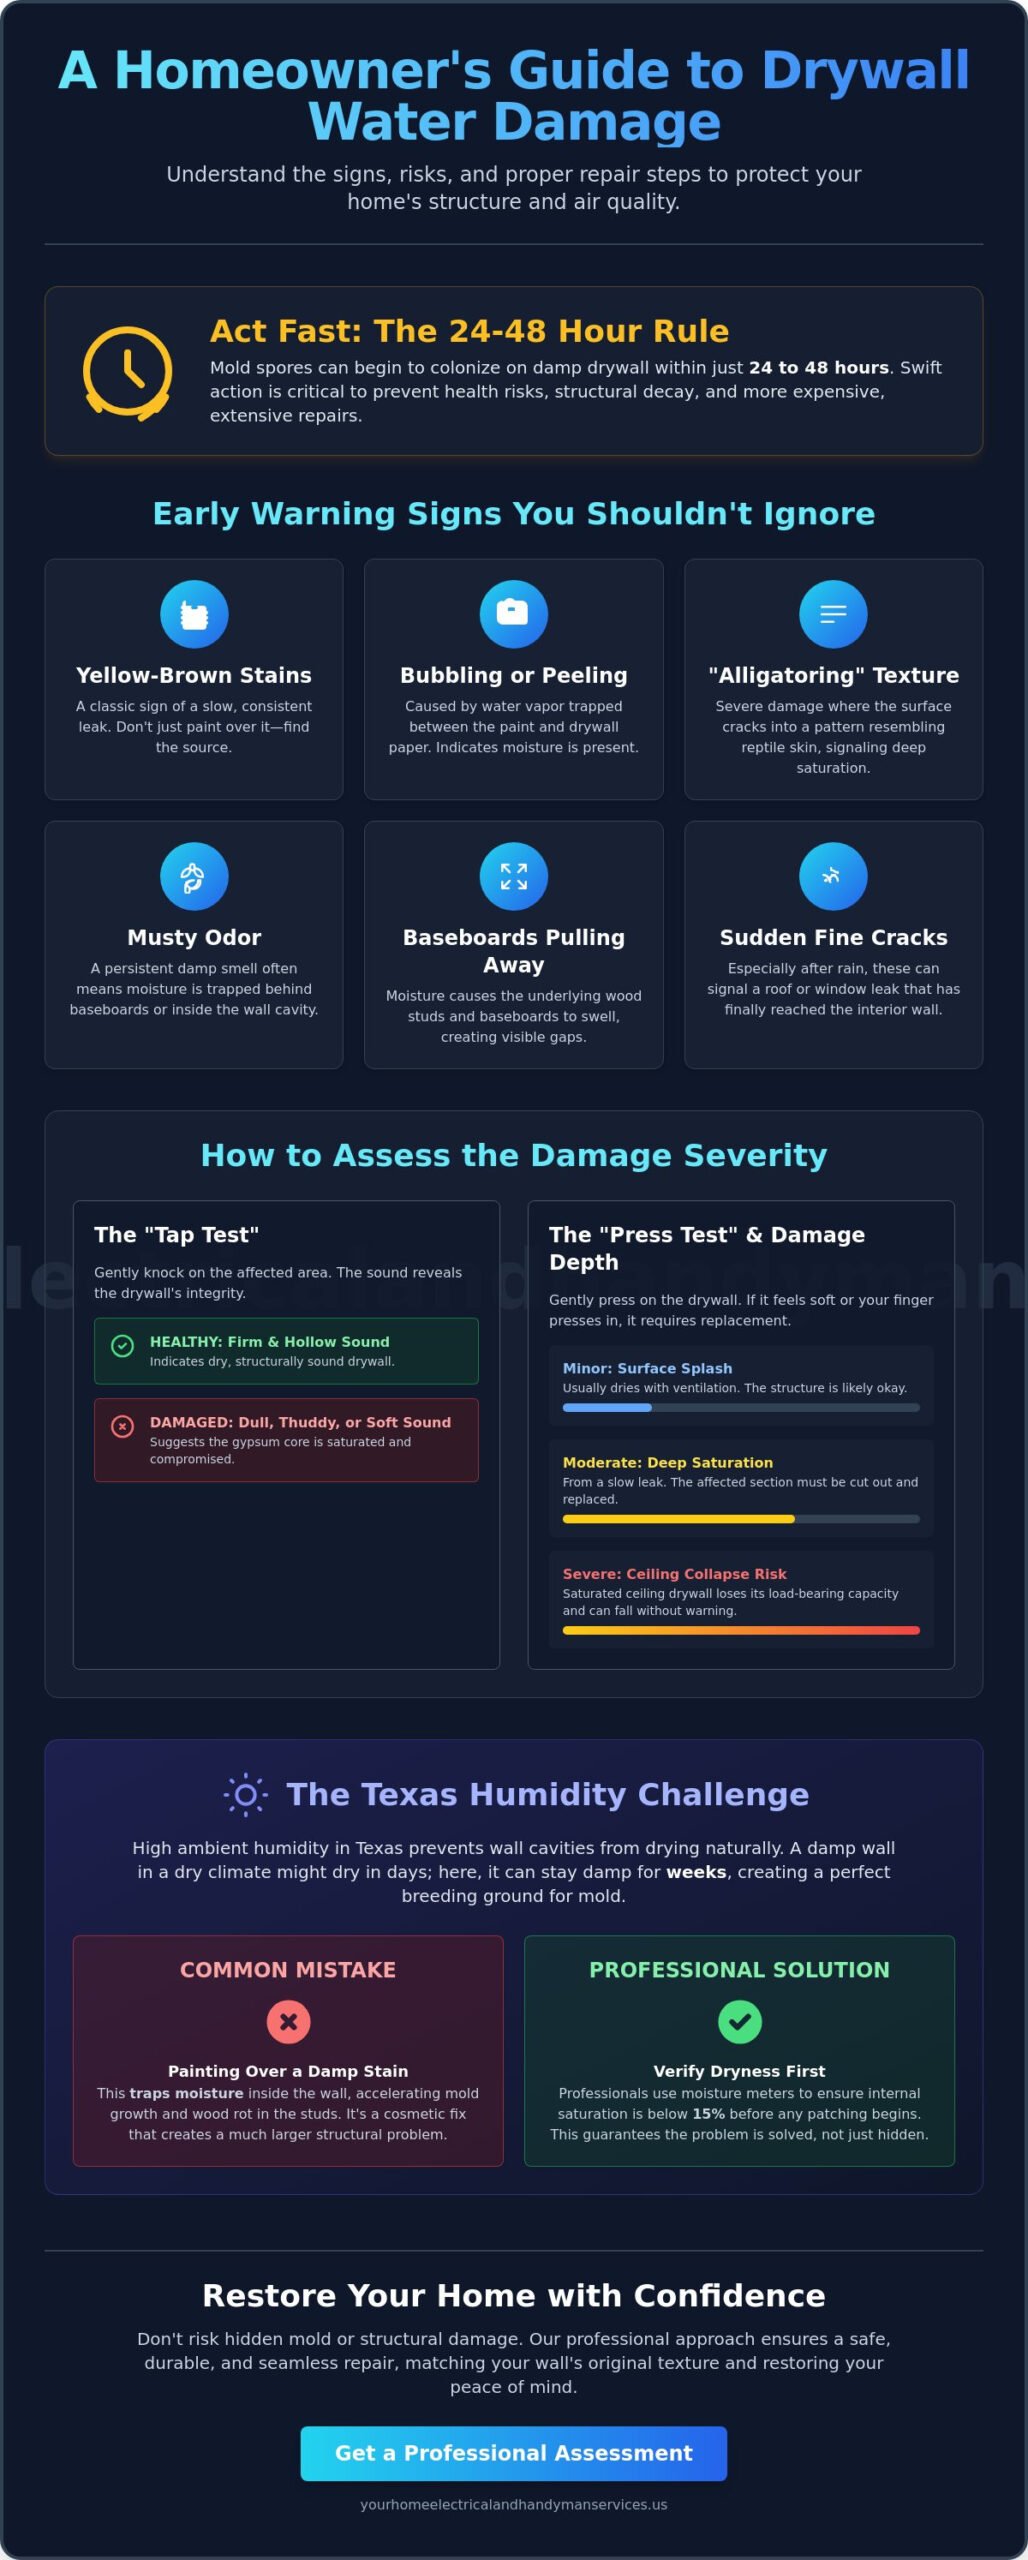
Before you can fix a problem, you need to understand the material you are working with. What is drywall exactly? It is a panel made of a gypsum core sandwiched between heavy paper facings. When water hits it, the gypsum absorbs moisture like a sponge, and the paper begins to delaminate. This structural compromise is why water damage drywall repair is more than just a cosmetic fix. It is about restoring the integrity of your wall. If the core is compromised, the material loses its ability to hold fasteners, and the structure can eventually fail.
You will usually see the signs before you feel them. Look for bubbling paint, which happens when water vapor gets trapped between the paint layer and the paper. Yellow-brown staining is another classic sign, often indicating a slow, consistent leak. In severe cases, you might see “alligatoring” textures. This is where the surface cracks into a pattern resembling reptile skin. These visual cues are your first line of defense in identifying how far the moisture has traveled.
How do you know if the damage is deep? Use the “tap test.” Gently knock on the affected area with your knuckles. Dry, healthy drywall sounds firm and hollow. Water-saturated drywall sounds dull, thuddy, and soft. If your finger can press easily into the material, it is past the point of a simple patch. It is also important to differentiate between surface splashes and deep-source saturation. A surface splash from a spilled bucket usually dries out with proper ventilation. Deep-source saturation from a pipe leak or roof failure requires cutting the material out to prevent long-term decay.
Preventing these issues often starts with the exterior; for instance, ensuring that trees are professionally managed by experts such as cdatree.com can protect your roof from falling limbs that cause moisture to seep into your walls.
Early Warning Signs You Shouldn’t Ignore
Sometimes the signs aren’t visual. A persistent musty odor often means moisture is trapped behind your baseboards, even if the wall looks fine. You might notice wallpaper peeling at the seams or baseboards pulling away from the studs as the wood swells. In Texas, keep an eye out for fine cracks that appear suddenly after heavy rainstorms. These often signal a roof or window leak that has finally reached the interior wall cavity, requiring immediate attention to prevent further spread.
The 24-Hour Rule: Why Speed Matters
Timing is everything. Mold spores can begin to colonize within 24 to 48 hours of moisture exposure. Beyond health risks, saturation destroys the load-bearing capacity of the material. This is especially dangerous for ceilings, where heavy, wet drywall can collapse without warning. Quick action is the key to successful water damage drywall repair. If you wait too long, a small patch job turns into an expensive “stud-to-stud” replacement because the moisture has traveled too far to save the surrounding panels.
The Science of Moisture and Mold in Texas Homes
In areas like Richmond, Katy, and Sugar Land, the air often feels thick enough to drink. This high ambient humidity is a major hurdle for water damage drywall repair because it prevents wall cavities from drying naturally. While a homeowner in a drier climate might see a wall dry out in a few days, a Texas wall cavity can remain damp for weeks. This persistent moisture creates a perfect environment for fungal growth, especially since drywall is essentially a buffet for mold. The paper facing is made of cellulose, which serves as the primary food source for spores once moisture is introduced.
A common mistake is attempting to hide a water stain with a quick coat of primer. This shortcut is often counterproductive. Painting over damp drywall creates a waterproof seal that traps moisture inside the gypsum core. This trapped water continues to degrade the material and accelerates wood rot in the underlying studs. To avoid this, professionals use moisture meters to verify that the internal saturation has dropped to safe levels, typically below 15 percent, before any patching begins. If you are concerned about hidden moisture, a professional assessment for drywall patching and repair can ensure your walls are truly ready for a finish coat.
Humidity and the Drywall Drying Process
There is a significant difference between surface dryness and internal core saturation. Even if a wall feels dry to the touch, the gypsum core can hold enough water to support mold growth for days. In Texas, our air conditioners work overtime to fight the heat, which creates temperature differentials between the inside and outside of your home. The dew point is the specific temperature at which air becomes fully saturated with water vapor, causing moisture to condense into liquid droplets on the cooler surfaces inside your wall. This condensation can keep wall cavities damp even after the initial leak is fixed.
Identifying Hazardous Mold vs. Mildew
It is vital to distinguish between surface mildew and deeper mold issues. Mildew is usually grey or white and sits on the surface, while mold often appears as green, black, or fuzzy patches that penetrate deep into the drywall fibers. Exposure to these spores can lead to significant health risks of mold, ranging from simple eye irritation to serious respiratory issues. In Texas, if visible mold covers an area of 25 contiguous square feet or more, state law requires a licensed consultant to write a remediation protocol. When handling smaller areas, always follow safety protocols by wearing an N95 mask and using a HEPA vacuum to contain dust during demolition.
Assessment: DIY Patching vs. Professional Drywall Repair
Deciding whether to handle a repair yourself or call in a professional depends on the scale of the saturation and its location. A small stain on a bedroom wall is vastly different from a sagging section of a kitchen ceiling. You should start by measuring the affected area. If the damage is localized and the source of the leak is fully resolved, you might be able to manage the fix over a weekend. However, larger projects often involve complexities that go beyond simple aesthetics. This is especially true when moisture interacts with your home’s infrastructure.
One critical factor many homeowners overlook is the “Hidden Hazard” of electrical systems. Water doesn’t just damage the gypsum; it often follows the path of least resistance, which frequently leads directly to electrical boxes, outlets, or recessed lighting fixtures. If your water damage is near any of these components, the risk of a short circuit or fire increases significantly. Following EPA guidelines on mold cleanup is a great start for safety, but it doesn’t account for the electrical risks inherent in saturated walls. In areas like Katy and Richmond, building codes are strict about how electrical components must be handled in damp environments, making professional oversight a matter of safety as much as quality.
When to Tackle the Repair Yourself
You can typically manage a water damage drywall repair if the damaged spot is smaller than a dinner plate and shows no signs of sagging or structural failure. Your essential tool kit should include a sharp utility knife, joint compound, a few different sizes of putty knives, and sanding blocks. Before you touch the wall, you must confirm the original leak is sealed. If you skip this step, your new patch will simply bubble and fail within weeks. For these minor cosmetic fixes, a patient DIY approach can yield excellent results as long as you allow for proper drying times between coats of mud. Before starting any project, it is also worth reviewing a detailed drywall repair cost guide for Texas homeowners so you can budget accurately and understand what professional labor entails.
Why Water Damage Often Requires a Professional Handyman
Ceiling repairs are notoriously difficult because you are fighting gravity while trying to achieve a smooth finish. Mudding overhead is a messy, physically demanding task that requires specialized techniques to prevent the patch from falling out. Additionally, if the damage is extensive, you may need to navigate around live electrical circuits or plumbing lines. A professional team brings the benefit of understanding both structural and electrical requirements, ensuring your home remains up to code. If you aren’t sure about the extent of the moisture spread, seeking an expert assessment for drywall repair Sugar Land can prevent a small leak from turning into a major structural issue. Professionals also ensure that the final product matches your existing home warranties and insurance documentation requirements, providing a paper trail of quality work.
Step-by-Step Restoration and Drywall Texture Matching
Restoring your wall requires a methodical approach to ensure the repair is both structurally sound and visually invisible. Start by creating a dust containment zone. Use heavy-duty plastic sheeting and painter’s tape to seal off the work area and protect your furniture. Sanding joint compound creates fine particles that travel easily through HVAC vents, so covering nearby returns is a vital step. Once the area is protected, use the “Square-Cut” method. Instead of just patching a jagged hole, use a utility knife or drywall saw to cut out a clean rectangular section of the damaged material. This ensures your new piece of drywall has a flat, solid surface on the wooden studs for secure attachment, preventing the patch from shifting or cracking later.
A successful water damage drywall repair relies on patience during the drying phase. Many online tutorials suggest a single thick layer of mud is enough, but this often leads to cracking and shrinking as the moisture evaporates. You should plan for a three-coat process. The first coat fills the gaps, the second levels the surface, and the third provides the final smoothing. Each layer needs to be thinner and wider than the last to create a gradual slope that the eye cannot detect. If you find the process overwhelming or want to ensure a professional finish, our team offers expert drywall patching and repair to restore your home to its original condition.
Mastering the Mud: Taping and Sanding
Using the right materials makes a significant difference in the longevity of the fix. Fiberglass mesh tape is often superior for water-damaged areas because it doesn’t trap moisture like paper tape and provides a stronger bond. After applying the tape, you must master the art of feathering. Feathering is the technique of spreading joint compound thinner at the edges of a patch to blend it seamlessly into the surrounding wall surface. Between each coat, use a fine-grit sanding block to remove ridges. This creates the perfectly flat canvas needed for the final texture application.
Matching Texas Textures: Orange Peel and Knockdown
Most homes in Richmond and Katy feature specific textures like “Orange Peel” or “Knockdown.” Matching these requires the right consistency of mud and specific tools. For Orange Peel, a texture spray can or a hopper gun set to a fine mist usually does the trick. Knockdown texture is more complex. You must spray the mud in larger droplets, wait for it to partially dry, and then use a wide trowel to gently “knock down” the peaks. Timing is critical here. If you swipe too early, the mud smears; too late, and it won’t flatten. Finally, always apply a high-quality PVA primer. This seals the porous joint compound so the final coat of paint absorbs evenly, preventing the repair from looking “flashed” or dull compared to the rest of the wall. For Sugar Land homeowners who want a truly invisible result, our professional drywall repair Sugar Land restoration guide outlines the exact framework our technicians use to achieve a seamless finish.
Restoring Your Home with Your Home Electrical and Handyman Services LLC
Choosing the right partner for your water damage drywall repair means finding a team that understands the complex systems hidden behind your walls. When you are dealing with the aftermath of a leak, you need more than just a quick fix. You need a partner who prioritizes long-term reliability and structural safety. Your Home Electrical and Handyman Services LLC serves the Richmond, Katy, Sugar Land, and Rosenberg areas, bringing a grounded and professional approach to every restoration project. We operate as a “Stable Expert,” meaning we are fully licensed, insured, and deeply committed to the local community. You can feel confident that your property is in safe, capable hands from the initial assessment to the final coat of paint.
We understand that the biggest concern for many homeowners during a repair is the mess. Drywall dust is notoriously fine and can easily travel through your home if not managed correctly. Your Home Electrical and Handyman Services LLC takes our commitment to cleanliness seriously by creating strict dust containment zones and using specialized equipment to manage debris. Our goal is to leave your home in better condition than we found it. By managing the environment carefully, we ensure that your air quality is protected while we restore your home’s aesthetic appeal. This methodical and logical process is designed to alleviate the stress often associated with technical household issues.
A Comprehensive Approach to Home Repair
We don’t just patch a hole and move on. Because our expertise spans both electrical and handyman work, we perform a thorough inspection of the area before any drywall is installed. We check for underlying issues with wiring or plumbing that might have been compromised by moisture. This dual perspective is vital for projects involving recessed lighting or plumbing fixture replacements near the damaged site. Our team also excels at expert texture matching, ensuring that the repair is invisible. This attention to detail saves you from the unnecessary expense and hassle of repainting an entire room just to hide a single patch. For homeowners looking for consistent quality across all maintenance needs, our handyman services Katy TX provide a reliable solution for full-home care.
Schedule Your Professional Assessment Today
Homeowners in the Richmond and Sugar Land area deserve a repair process that is transparent and straightforward. Our booking process is designed for ease of navigation, providing you with clear communication and professional standards you can rely on. Your Home Electrical and Handyman Services LLC prioritizes clarity and trust-building by offering declarative answers to your concerns and standing by the quality of our craftsmanship. If you are ready to move past the anxiety of water damage and restore your living space to a safe, mold-free environment, we are ready to assist. You can Get a quote for your drywall repair today and take the first step toward a seamless, professional restoration.
Take Control of Your Home’s Restoration
Addressing moisture issues quickly is the most effective way to protect your home’s structural integrity and air quality. You now understand how to identify the early signs of saturation and the importance of verifying that the internal core is dry before starting any work. While small cosmetic fixes are manageable, complex projects involving ceilings or areas near electrical systems often require a specialized touch to ensure safety and code compliance. Proper water damage drywall repair is about more than just a patch; it’s about ensuring the underlying environment is healthy and stable.
Our team has been serving Richmond, Katy, and Sugar Land since 2021, providing the technical expertise needed for a seamless finish. With our licensed and insured technicians and expert texture matching specialists, we ensure your walls look brand new while maintaining a clean and dust-free environment during the process. Don’t let a small leak turn into a major structural headache. We are ready to help you restore your property with the professional care it deserves.
Request Your Water Damage Assessment in Richmond & Katy
Your home is your most significant investment, and taking the right steps today ensures it stays beautiful and safe for years to come.
Frequently Asked Questions
How do I know if water-damaged drywall needs to be replaced?
You should replace drywall if the material feels soft, sags, or shows signs of crumbling. Perform a “tap test” or press your finger against the surface; if it gives way or feels spongy, the gypsum core is compromised. Deep saturation often leads to structural failure and mold growth, making replacement the safest option for your home’s integrity and air quality.
Can I just paint over a dried water stain on my ceiling?
Painting over a stain without treating the underlying cause is a temporary cosmetic fix that often leads to bigger problems. Standard paint doesn’t seal moisture, and the stain will likely bleed through the new layer. You must first ensure the leak is fixed and the area is fully dry, then use a specialized stain-blocking primer before applying your final coat to prevent the discoloration from returning.
How much does it typically cost to repair water-damaged drywall in Texas?
The cost of water damage drywall repair in Texas varies based on the size of the affected area and the complexity of the texture. While minor patches are less labor-intensive, ceiling repairs or projects requiring extensive moisture mitigation increase the total scope. Homeowners should check with local professionals for a specific assessment, as factors like local building codes in Richmond or Katy influence the final requirements. For a detailed breakdown of what to expect, our 2026 drywall repair cost guide for Texas homes provides localized pricing information to help you plan your budget.
Is mold always present in water-damaged drywall?
Mold isn’t always present immediately, but it can begin to grow within 24 to 48 hours of moisture exposure. Since drywall contains cellulose, it provides a primary food source for spores. If the wall cavity remains damp due to high Texas humidity, mold growth becomes highly likely. Prompt drying and professional inspection are the best ways to prevent a small leak from becoming a health hazard.
How do I match the texture of my old drywall after a repair?
Matching texture requires identifying whether your wall has an “Orange Peel,” “Knockdown,” or “Popcorn” finish. You can use specialized spray cans or a hopper gun to apply joint compound in a pattern that mimics the surrounding area. For knockdown finishes, you must wait for the mud to partially set before gently flattening it with a wide trowel. Achieving an invisible blend takes practice and patience.
What is the fastest way to dry out drywall after a leak?
The most effective way to dry drywall is to increase airflow and decrease humidity in the room. Use high-powered floor fans pointed directly at the wet area and run a dehumidifier to pull moisture from the air. In some cases, you may need to remove baseboards or drill small holes to allow air to circulate inside the wall cavity, especially in humid climates like Sugar Land.
Should I call a plumber or a handyman first for a water stain?
You should call a plumber first if the water stain is actively growing or if you suspect a leaking pipe. It’s impossible to perform a lasting water damage drywall repair until the source of the moisture is completely sealed. Once the plumbing issue is resolved and the area has dried, a professional handyman can then handle the structural restoration, sanding, and texture matching.
How long does a professional drywall repair take to complete?
A professional repair typically takes two to three days to finish correctly. This timeline accounts for the necessary drying time between the three coats of joint compound. While the actual labor hours might be relatively short, rushing the process can cause the patch to shrink or crack. Proper texture application and painting usually happen on the final day once the surface is perfectly smooth and primed.
3 Responses